In this blog I am going to share with you one interesting
feature of Documentum i.e. Job Sequence.
Many times we came across scenarios where we want to run our
custom Documentum job after completion of another job. Job Sequence is one of
the out of the box feature available which we can utilize to get over these
kinds of requirements.
Important
information which we need to keep in mind
1. We
can put replication jobs and custom jobs only in a sequence. We cannot put
system-defined jobs, other than replication jobs, in a job sequence.
2. A
job sequence is stored in the repository as a set of dm_job_sequence objects. Each job sequence object represents one
job in the sequence. The information in the job sequence attributes is used by
the dm_run_dependent_jobs method to
execute the job and the sequence.
3. We
need to have Sysadmin or Superuser
privileges to create a job sequence.
4. Associated
methods of the Jobs must have a value
for either or both of the following attributes: success_return_codes and success_status
attributes.
5. We
can add as many jobs in Job Sequence but there must be one job which is
independent of other jobs.
Job sequence can be created easily using Graphical User Interface DA (Documentum Administrator) like below.
For the sake of simplicity I am taking 2 jobs as reference.
Please find the below table for the details.
Job Name
|
Method Name
|
TestJob1
|
TestMethod1
|
TestJob2
|
TestMethod2
|
Now we want to create one job sequence i.e. TestJobSequence so that we can enforce
the rule that TestJob2 runs only
after the competition of TestJob1.
Prerequisites:
Before creation of Job Sequence we have to make sure that
below conditions are met.
·
TestJob1 and TestJob2 must be in Inactive state.
·
Associated methods i.e. TestMethod1 and TestMethod2 have a
value for the attribute success_return_codes
as 0
Now I
think it’s better to start with the implementation part using DA J
To begin with just to make sure that we have fulfilled all the prerequisites check like below:
Method Success Codes set as 0 for both the methods.
TestJob1 and TestJob2 are Inactive
Now we are ready to create the job sequence. Login to the target repository and follow the snapshots below:
Step -1
Step -2
Step -3
Step -4
Here you can add other repository jobs as well. You just need to provide the login information of that repository.
Step -5
On click of Add button of Job Sequence Information section of Step 4, list of jobs will appear and select those jobs (i.e. TestJob1 and TestJob2) to make it part of Job Sequence.
Step -6
Once jobs are selected it will appear
in Job Sequence Information section like below.
Step -7
In Job Sequence
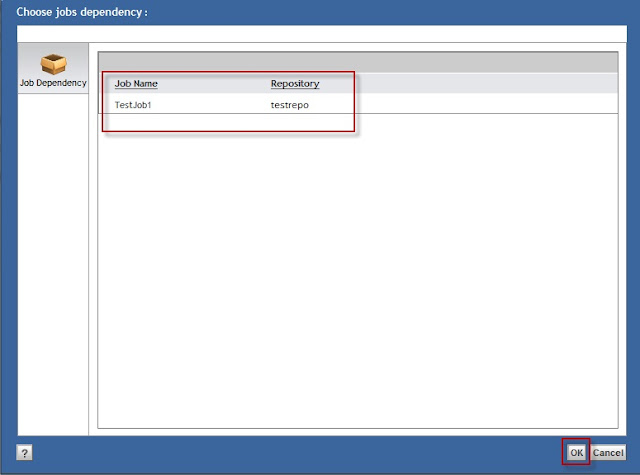
Information section on click of Edit button near TestJob2 below screen
will appear to choose the job TestJob1. Select the job and click ok.
Step
-8
Once dependent job is selected it will
appear in the same rows like below. Now TestJob2 is dependent of TestJob1.
Finally we have created our first Job
Sequence TestJobSequence successfully.
To know more about Job Sequence you can refer to Content Server Administration Guide.
Do post your comments :-).


